


 Bullhorn’s marketplace of 100+ pre-integrated technology partners gives recruitment agencies the tools they need to build a unique, future-proof solution.


Support Tip: Hotlists v. Distribution Lists

As a Bullhorn user, you will have seen distribution lists and hotlists (or tearsheets) in your Menu, on your Quick Add, when taking actions on records in a list, or even on individual records. You might be a regular user, or perhaps you’ve never fully understood the core use and functionalities and have never dived too deep into these.
Or, if you are maybe using distribution lists frequently, but are not sure of the purpose of hotlists, or vice versa, then hopefully the below will help you clarify a few things.
Let’s start by looking at the core functionalities and differences.
Hotlists
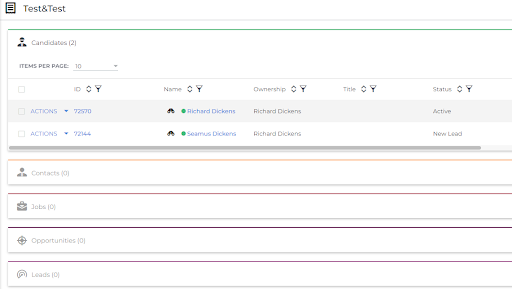
Hotlists are used to organise and manage your work list, they help us keep track of records and usually remain a static list.
For example, let’s run a candidate search based on location, skillset, and availability. You can then add these candidates to a tearsheet as they will be your list to call through tomorrow.
Hotlists are mainly used for the short term. However, use for the longer term is possible; just make sure you keep on top of it!
Hotlists are also not just there for your candidate records, but can also contain contact, job, lead, and opportunity details.
Distribution lists
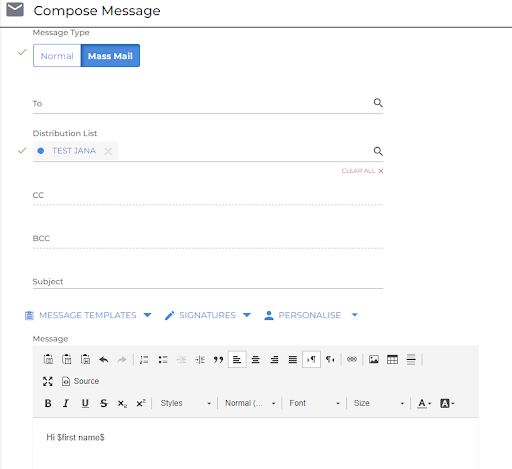
The core purpose of a distribution list is mass mailing. It’s creating a list of records (candidates, leads, contacts) with the intent of sending an email in bulk.
The advantages of creating a distribution list, instead of just emailing them in bulk from your core list, are that you will be notified how many people have invalid email addresses and how many people have opted out.
The second type of distribution you can create is one for internal use only — for example, when notifying recruiters about a new role that’s been added.
Using hotlists to keep track of records
First, let’s start by running a search in one of your records’ lists.
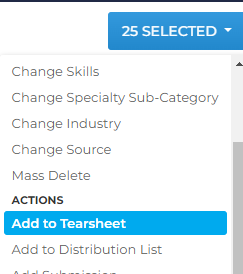
Select all records you want to add to the tearsheet -> 25 selected -> add to tearsheet. Here, you can create a new tearsheet or add to an existing one and choose to make it public or private.
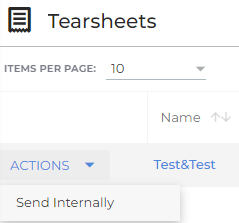
Now, there are two ways to see and take actions on the records you’ve just added to the Tearsheet. Firstly, you can open your Tearsheet list from within your Menu. You will see all the hotlists you’ve created or the ones that are set to Public.
From here, you can also share hotlists with internal users by clicking on Actions, and then “send internally”.
Here, you will notice that you can add different types of records to 1 Tearsheet. As an example, you might want to add the job record to the list with candidates and share this with a new recruiter in your business. That way, the new recruiter has a list of candidates to call through for that specific job.
The second way to view records within a specific tearsheet is by heading to your original candidate list and work from there. Here, you will run a search by clicking on the search bar at the top, head to Additional Criteria and search for Hotlists. You can then select the exact hotlists your candidates have been added to.

Both views have their advantages. If you choose to view your hotlists from the list in your menu, you will be able to see all the linked records, such as jobs, in that same list.
However, if you choose to use the additional criteria search, you will be able to see all the candidates in the layout you’ve chosen, move columns around and take more actions using the actions button.
I’d recommend trying out both ways and working out what suits you best!
Using distribution lists to send mass mails
As mentioned initially, the core functionality of distribution lists is for mass mailing purposes, so let’s have a look at the process of creating one!
Let’s assume we have a list of clients we want to email with the purpose of making an introduction. I will start from my Contact List -> Select all relevant contacts -> select the action “ add to distribution list”. Here, you can choose to link to an existing or create a new distribution list, choose the type and make it public or private.
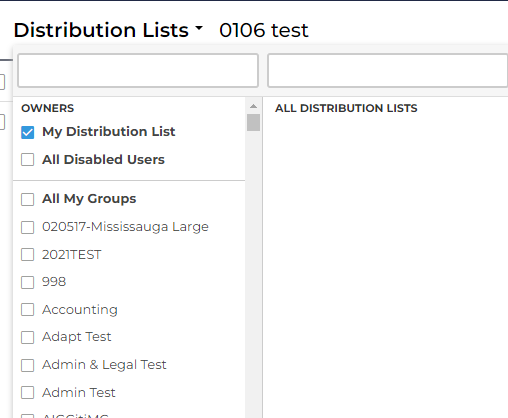
From our Menu, we can then open up Distribution Lists, and this will load the last list we’ve opened. You can manage all your distribution lists by clicking on “Distribution Lists” at the top and filter on ownership.
You can find more information on managing distribution lists here.
Select all records you want to email -> Selected -> Email All. The default email type will be mass mail; this ensures that everyone is BCC’d and that you can personalise your emails, using the personalisation button.
You also have the option to add in some email templates, which will definitely save you time in the long run!
This article explains mass mailing in further detail for you.
A few things to know when using distribution lists:
- If anyone on your distribution list has a blank or incomplete email address, you will receive a list of those records so that you can correct their email addresses.
- Because a mass mailing is sent from within Bullhorn, you will not see these messages in your sent items; however, you will receive a copy of the original email in your inbox. Replies to your mass email will also appear in your inbox.
- Bullhorn automatically adds an opt-out message to a mass mails with more than ten recipients. If a person on your list is opted-out, the system will not send a mass email to that individual.
- Bullhorn logs mass mailings as a Note with the Email action type. This creates a single Note which references every recipient’s record.
- You can only send a mass mailing to 500 recipients at once. If you have more than 500 recipients to email, you would add all of them to a Tersheets and then convert every 500 records in the tearsheet into a distribution list.
Using distribution lists for internal notifications
A lesser-known purpose of distribution lists is for internal notifications.
Let’s say you’d like the entire management team to be notified every time someone adds a placement to the system – this is where a different type of distribution list kicks in.
As we are working with internal users, we are not going to start from any list, but instead, navigate towards the quick Add at the top of your Bullhorn and then select “Distribution List”. In the “Type” section we will choose Internal-Placement, as per the example above.
However, as you can see, you can also choose “Internal-Job” and “Internal-Submission”, which notifies anyone in the list when either a job or a submission record has been created.
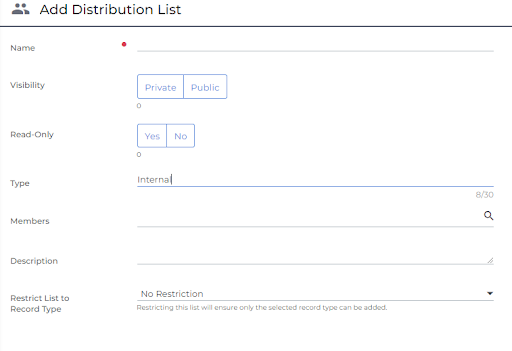
Once this has been saved, the users in this list will automatically receive an email notification every time any of the above actions has been completed.
You can find more information on the above in this article.
Hopefully, this was insightful, and you will start using hotlists and distribution lists more often and make it part of your daily practice!
For more tips and tricks from our support team, subscribe to the Bullhorn Customer blog.