Support Tip: The Importance of Tracking the Hiring Workflow

As a Product Consultant, I help small business clients get started with Bullhorn. During training, we run through the entire hiring workflow, from prescreening a new candidate all the way to making a placement. This workflow is extremely valuable, and not using it to its full functionality likely means you’re missing out on added productivity.
Before we begin on the hiring workflow…
A summary of the hiring workflow steps can be found under a candidate record or under a vacancy. It usually looks something like the image below.

Your workflow may look different from the above as this is subject to the country where you’re located as well as any customisation that your administrator may have applied to enable your company’s unique, productive workflow.
Prescreening & the importance of notes
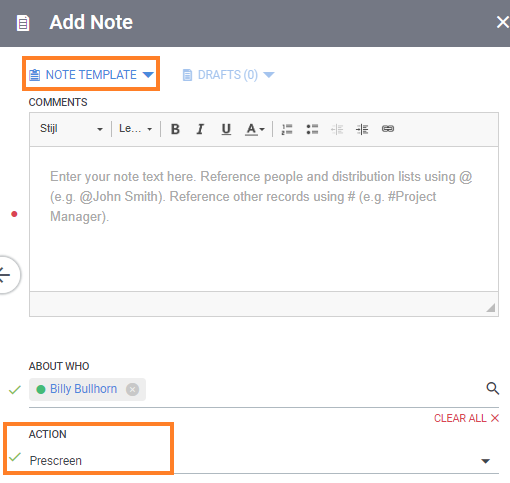
The very first step of the workflow (starting from the candidate view) is called “Prescreen.” A prescreen is a preliminary recruiter interview with a candidate. It’s important to leave a note when completing a prescreen conversation because a lot of that basic information, such as salary wishes, distance to travel, and more, is discussed in this call. The more you log in that note, the less you have to remember.

I’m a big fan of using note templates for prescreen notes. Why? Templates save time—they allow you to put in the note in a structured way so that you only have to add the answers instead of starting from scratch. When working with multiple recruiters, the note template also guarantees that everyone is gathering the same candidate information during this first step of the process.
Shortlisting a candidate to a job
After completing the prescreen, you may want to link the candidate to a job. This is done by shortlisting the candidate—an Internal Submission. Creating a shortlist is a crucial step because it provides you with a full overview of all candidates that are being considered for a job.
When shortlisting the candidate to the job, you have the opportunity to fill out a little extra information where needed. And don’t forget—the more you log the less you have to remember. Any comments you add when creating a shortlist will appear both in the candidate and the job record.
Introducing a candidate to a client
The next step in the process is a Client Submission. This means that we are ready to introduce the candidate to the client by sending over their resume. Like shortlisting, this step also allows you to leave a comment when moving the candidate. Comments are the best way to keep track of any communication that might have unfolded about that candidate or the specific vacancy you’re working on. You can use these comments to track your progress.
The client submission will give you the option to complete with or without an email directly through Bullhorn.
The upside of sending this email through Bullhorn is that:
1. You can use a premade email template which will save you time.
2. The sent email is automatically stored under the client’s email tab.
3. You’ll be able to see if they’ve opened the email from the internal submissions overview.

4. You can select a large group of candidates and send them to your client all at once.
Scheduling an interview
Scheduling an interview between a client and a candidate works roughly the same as sending a resume, except that you’re not going to schedule an interview for all candidates at once but rather one by one. This is to make sure all the dates and times are logged correctly for each individual candidate.

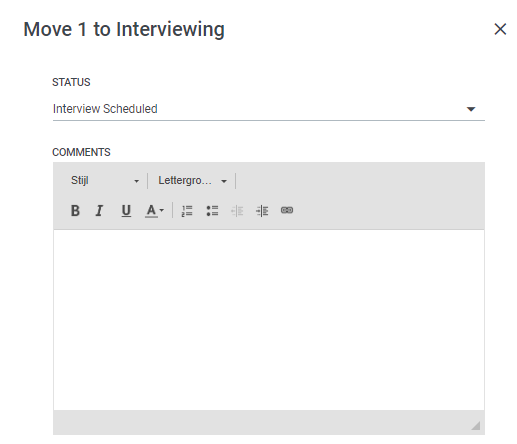
When you’re moving a candidate to the interviewing step, you have the opportunity to once again leave a note or comment with the information you’d like to save. We.love.notes.
Once you have logged the interview, you can easily keep track of them in the following places:
- The Planner in your Bullhorn Menu
- Your own Outlook or Gmail calendar
- The Bullhorn Standard Reports
In analysing these numbers, you will be able to see highs and lows per year and it will give you better insight into the overall productivity of your company.
Rejecting or confirming a candidate
After all the interviews are complete, you’ll either reject a candidate or make them an offer. Both options can, of course, be logged and processed in Bullhorn.

When you move a candidate to either Rejected or Confirmed, you need to do 2 things:
- Choose the correct status
- Leave a comment
The comment for the rejected step lets you track the reason why the candidate was rejected. For example: “Didn’t agree with the salary.” For the offer extended, your comment could include basic information on the offer, for example, “Agreed upon salary and start date…”
Placing a candidate
Congratulations! You’ve reached the last step of the hiring workflow: The placement! Once you move a candidate to ‘Placed,’ Bullhorn will give you the option to either close the job or leave it open for another placement. At this point, your candidate status will automatically switch to ‘Placed’ so you can easily track who you’ve placed through the system.
In the placement record, you can complete the missing information like salary information and the fees agreed upon with the client (Pay Rate, Bill Rate, etc.). These will be the most important fields needed for reporting on placement activity.
Important: Don’t forget to change the status to ‘Approved’ once the placement contracts have been signed and completed. Only approved placements are reflected in reporting.
Reporting on the hiring workflow
What’s the point of logging all these steps, comments, interviews, and work in Bullhorn? Simple answer: insight and oversight.
Tracking the work you and your recruiters are doing means that you will be able to fully use the reporting possibilities in Bullhorn. Think about it; if you only use half of the functionality; you won’t be able to gain insight into the full productivity of your company.
There’s one report that jumps out in relation to the hiring process: The Recruiter Activity Report. This report can be found under Menu > Tools > Reporting. It gives you a detailed overview of all of the steps discussed above: How many prescreens were completed, how many candidates were shortlisted, how many resumes were sent, etc. The reporting will not only give you a high-level overview, but you can ‘unfold’ the report to show more detail every step of the way.
I strongly advise heading into Bullhorn and playing around with the hiring workflow. Take note of the steps you might not be using already and see how you could introduce them into your company’s process.


 Bullhorn’s marketplace of 100+ pre-integrated technology partners gives recruitment agencies the tools they need to build a unique, future-proof solution.